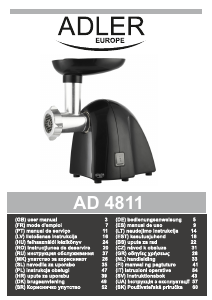
Priručnik Camry CR 4812 Stroj za mljevenje mesa
Trebate priručnik za svoj Camry CR 4812 Stroj za mljevenje mesa? U nastavku možete pogledati i besplatno preuzeti PDF priručnik na hrvatskom jeziku. Ovaj proizvod trenutno ima 3 često postavljanih pitanja, 0 komentara i ima 0 glasova. Ako ovo nije priručnik koji želite, kontaktirajte nas.
Vaš je proizvod neispravan i priručnik ne nudi rješenja? Otvorite Repair Café za besplatne usluge popravka.
Priručnik
Loading…


Loading…
Ocjena
Ostavite ocjenu proizvoda Camry CR 4812 Stroj za mljevenje mesa i recite nam što mislite o njemu. Želite podijeliti svoje iskustvo s proizvodom ili postaviti pitanje? Ostavite komentar na dnu stranice.Više o ovom priručniku
Razumijemo da je lijepo imati papirnati priručnik za svoj Camry CR 4812 Stroj za mljevenje mesa. Uvijek možete preuzeti priručnik s naše web stranice i sami ga ispisati. Ako želite imati originalni priručnik, preporučujemo da kontaktirate Camry. Oni bi mogli osigurati originalni priručnik. Tražite li priručnik za svoj Camry CR 4812 Stroj za mljevenje mesa na drugom jeziku? Odaberite željeni jezik na našoj početnoj stranici i potražite broj modela da vidite imamo li ga na raspolaganju.
Tehnički podaci
| Marka | Camry |
| Model | CR 4812 |
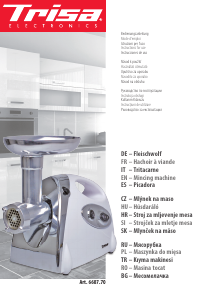
| Kategorija | Strojevi za mljevenje mesa |
| Vrsta datoteke | |
| Veličina datoteke | 2.97 MB |
Svi priručnici za Camry Strojevi za mljevenje mesa
Više priručnika za Strojevi za mljevenje mesa
Često postavljana pitanja o Camry CR 4812 Stroj za mljevenje mesa
Naš tim za podršku pretražuje korisne informacije o proizvodu i odgovore na česta pitanja. Ako u častim pitanjima naiđete na netočne informacije, obratite nam se putem obrasca za kontakt.
Može li se mlin za meso koristiti i za druge predmete osim za meso? Potvrđeno
To ovisi o marki i modelu, ali neke brusilice za meso mogu se koristiti i za kuhano povrće, pasiranje rajčice ili za tijesto.
Ovo je bilo korisno (56) Čitaj višeKoliko mali moram rezati meso da bih ga mogao staviti u mlin za meso? Potvrđeno
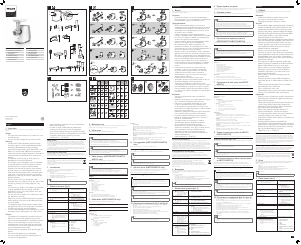
To ovisi o stroju za mljevenje mesa, ali općenito meso treba rezati na trake duljine 10 cm i debljine 2 cm.
Ovo je bilo korisno (41) Čitaj višeMogu li staviti smrznuto meso u mlin za meso? Potvrđeno
Ne, meso mora biti potpuno odmrznuto prije nego što se može unijeti u mlin za meso.
Ovo je bilo korisno (32) Čitaj više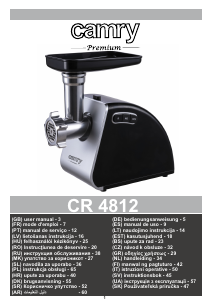


Pridružite se razgovoru o ovom proizvodu
Ovdje možete podijeliti što mislite o Camry CR 4812 Stroj za mljevenje mesa. Ako imate pitanja, prvo pažljivo pročitajte priručnik. Zahtjev za priručnik možete izvršiti putem našeg obrasca za kontakt.